Project: Round Side Table
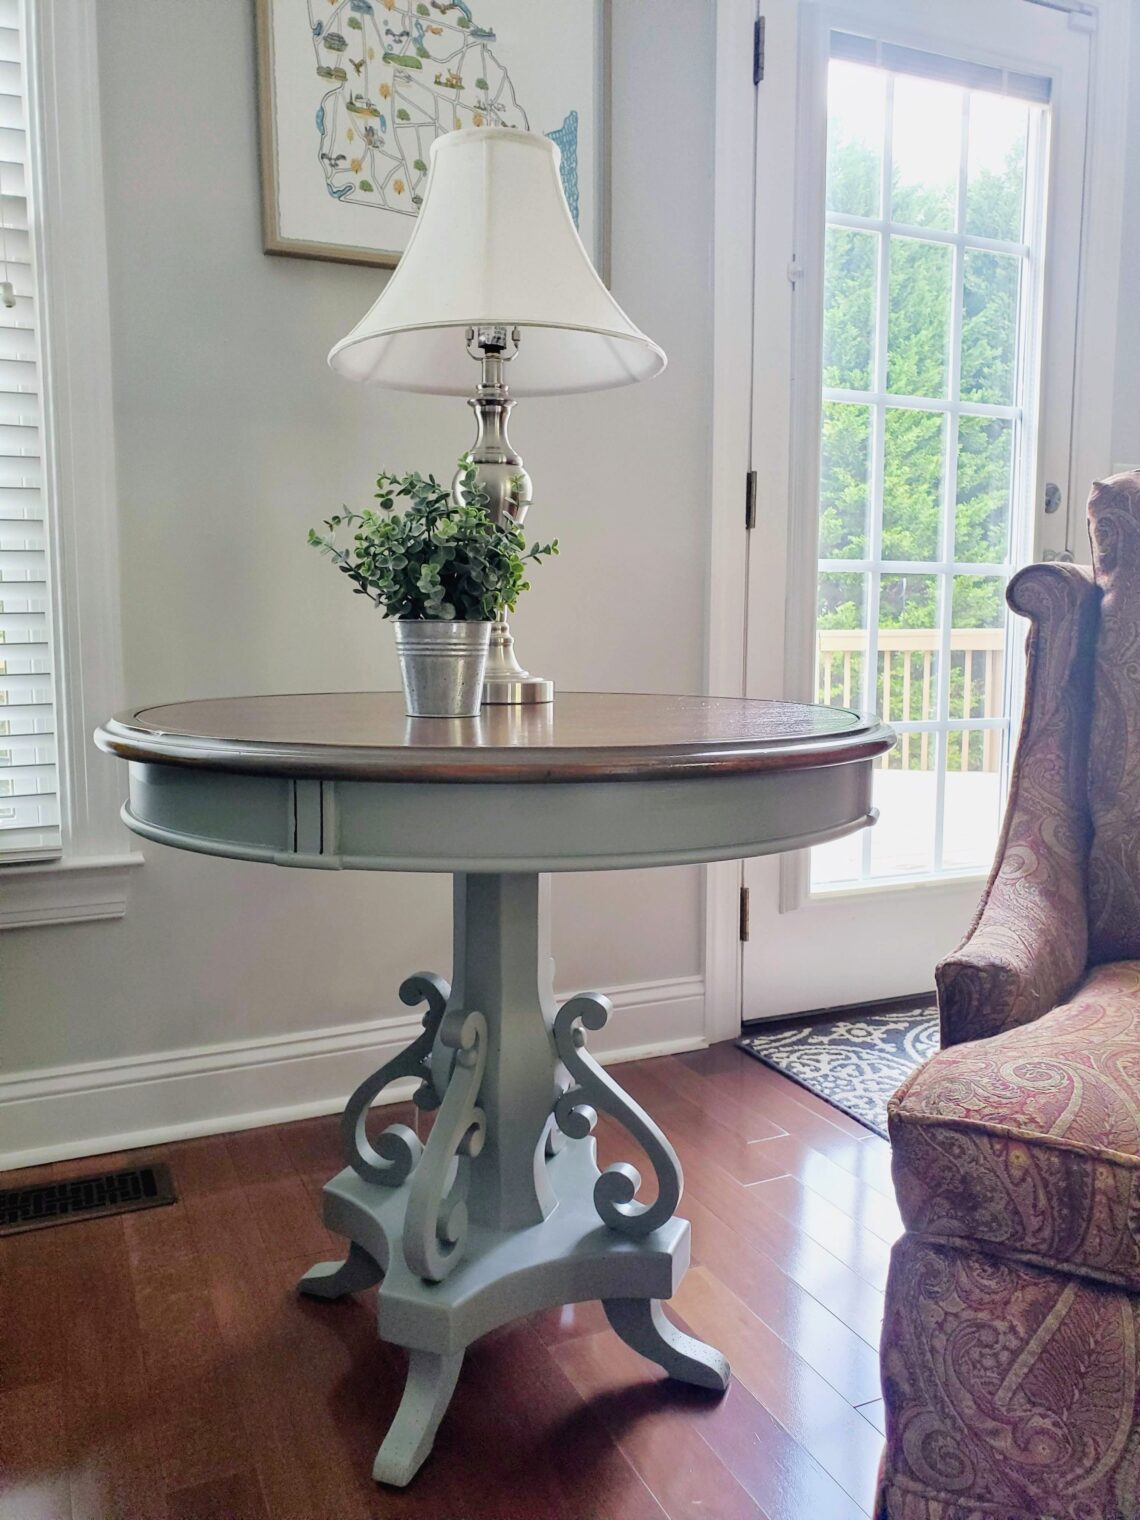
Objective: We have had this piece of furniture for about 13 years and have always loved it. Since we moved in our home it has been in the same spot and though it works and looks great, the beautiful features have never really stood out because the whole table completely blends in with the floor as they are the same color. So Ive been wanting to paint it for years. The top is beautiful and in great shape so Im not wanting to touch it. The table also has some pretty details that I am going to leave unpainted as well as the legs. I am going to go with an old white paint (going to blend some of my existing paint to make an Old White) and distress it.
Steps:
- Since I did not plan on painting the entire table I had some taping to do to protect the sections I did not want to paint.
- I had to mix Annie Sloan Pure White with Annie Sloan French Linen to make an Old White color. I had done this before for another piece. I wish I knew the exact ratio but remember this is no exact science (if it were I would not want to do it). I pour some Pure White in a separate container and just start by adding French Linen slowly stirring as I go and continue to add until I get the desired color. If its too dark just add a little more white or too light just add a little more French Linen.
- This table isn’t dirty at all but I am going to go over it a little with a wet rag.
- For paint adherence I scuff sanded with 220 grit sand paper over all the areas to be painted.
- After sanding vaccum all the saw dust and clean with a damp rag assuring all dust and debis is gone.
- Even though this furniture piece was dark I decided not to prime. I know I am going against my own advice on this one but sometimes you just take a chance and I felt like this was a good chance it would be okay. And I wasn’t painting it a Pure White color either.
- My paint seemed pretty thick so I added a good bit of water and used my spray bottle to spray my brush. Annie Sloan chalk paint tends to be a thicker chalk paint in comparison and I wish I had known the trick about adding water in my earlier painting furniture days though I probably wouldn’t have done it anyway as I actually liked the thickness of the paint but as Ive gained more experience I recognize the advantage of adding water to prevent brush strokes and also allow for more dry time as chalk paint dries very quickly in comparison to regular latex or acrylic paint.
- Always begin painting for the top and go down so I began at the trunk of the table working my way down. I used my Wooster short brush since there are some tight spots that a long handle would really get in the way.
- After allowing first coat to dry for several hours I applied second coat. I added more water to paint mixture before starting to paint and also sprayed paint brush and then wiped off excess in my paper plate.
** I like to use paper plates to continuously wipe excess water when spray paint brush as you don’t want drips so I spray brush, wipe on paper plate a few times and then dip in my paint and go.
- After allowing second coat to dry overnight I used 220 sand paper to lightly distress along the areas where I have painted. This was not the easiest table to do this as there are many hard to reach places. I also used the 220 to finely smooth some obvious brush strokes around some of those hard to reach spots that had accumulated paint.
- Vacuum and clean up from sanding. Wipe down with damp cloth and allow to dry.
- I applied clear wax to one section at a time using a wax brush then applied brown wax with a rag and continued to work in into the paint on the distressed areas. I continued this process section by section on the entire piece where I had painted.
- After allowing to dry overnight I buffed the entire piece with a lent free cloth for a satin finish.
AND…..after looking at this piece of furniture back in its spot in my family room I just wasn’t happy with it as it just wasn’t the vision I had in mind. The color turned out fine, the distressing was fine, it just was the overall look wasn’t what I wanted. So I was back to square one of thinking about this and what it was I really thought needed to happen now. Funny thing is, this was originally what I termed a simple little one day project…….well days later into the project Im back to square one but this is the nature of the beast.
I had originally thought about painting it one of the new fusion paint colors that I bought a few weeks ago but for some reason went with the distressed white look instead.
Steps:
- Since this paint had been heavily waxed I have to remove all of that before anything else can happen. Mineral spirits is a great way to remove the wax without hurting the furniture. I use the odorless mineral spirits as the odors are harsh if using indoors. I pour some mineral spirits in a metal bowl and soak a t-shirt rag in the mineral spirits and just as the wax was worked into the paint, the mineral spirts is worked into the wax in order to remove it. This was done section by section. You can feel the difference as the wax is removed as the sheen disappears.
- I learned the hard way that mineral spirits will eat through a plastic solo type cup. Oops!!
- After cleaning with mineral spirts I took several damps rag to make sure all the mineral spirits was removed.
- Scuff sanding with 220 sand paper was needed for two reasons. The first is adherence of new paint and the second is to remove any additional wax the mineral spirits left behind.
- Vacuum and clean up dust and debris.
- So we are once again ready to PAINT. I decided to paint the entire table with the exception of the top as the two toned look just wasn’t what I wanted. I used Fusion Paint in Sacred Sage. Its one of their retired colors that I still was able to purchase recently. I love Fusion paint as it is smooth as butter and even the first coat allows great coverage. I again used my Wooster short brush and worked from top to bottom. This paint dries quickly and recommended dry time is 2 hours.
- After about 2 hours I applied a second coat. I did add just a little bit of water to my container of paint for the second coat as I did not want any brush strokes.
- I originally was planning to apply a poly-crylic top coat but after the fusion paint had dried overnight and I saw how great the coverage was and also how smooth it felt I decided to go another route.
- I’ve wanted to try a finishing oil as I’ve heard all the rave about it and love the idea of a more natural way of loving your painted furniture pieces so what better piece to try this with.
- I bought the Fusion Hemp Oil and per their recommendations poured a little bit in a cup and brushed the oil liberally onto the furniture. Fusion recommends leaving the oil on the furniture for a few hours and then wiping off excess with a clean microfiber cloth. So that is exactly what I did. After wiping all the excess off the entire piece I went back with a clean microfiber cloth and wiped it all down once more. I was amazed at how beautiful the finished peace is. It has a luscious glow to it that is just rich. Not only was the color of Sacred Sage absolutely stunning but the Hemp Oil adds just the right amount of matte sheen.
Supply List (for second stage of table project)
Drop cloth and cardboard or wood blocks for feet of table
Tshirt rags, paper plate and blue shop clothes
Sand paper in 220 grit
Mineral spirts (I use the odorless kind as it can be pretty harsh if using indoors)
Metal bowl for mineral spirits
Wooster short brush
Small container for paint
Fusion mineral paint in Sacred Sage
Fusion Hemp oil
Project take away. You never know what will be a success and what will just not turn out the way you thought but the good news is you can still achieve the outcome you want. It will require some additional steps, elbow grease and time but you can get there. I love the way this table turned out in the end and I was able to sharpen my skills even better and try the hemp oil that I’ve been wanting to try. So much for a quick 1 day makeover project!!
Happy Painting!!

